Halloween Recipes
Chocolate Cake Mummy Pops
- AUTHOR Dallyn Maresco

Account
Log in to access your account and saved experiences.
Save recipes and personalize your homepage.
Account
Save recipes, follow authors, and personalize your homepage.
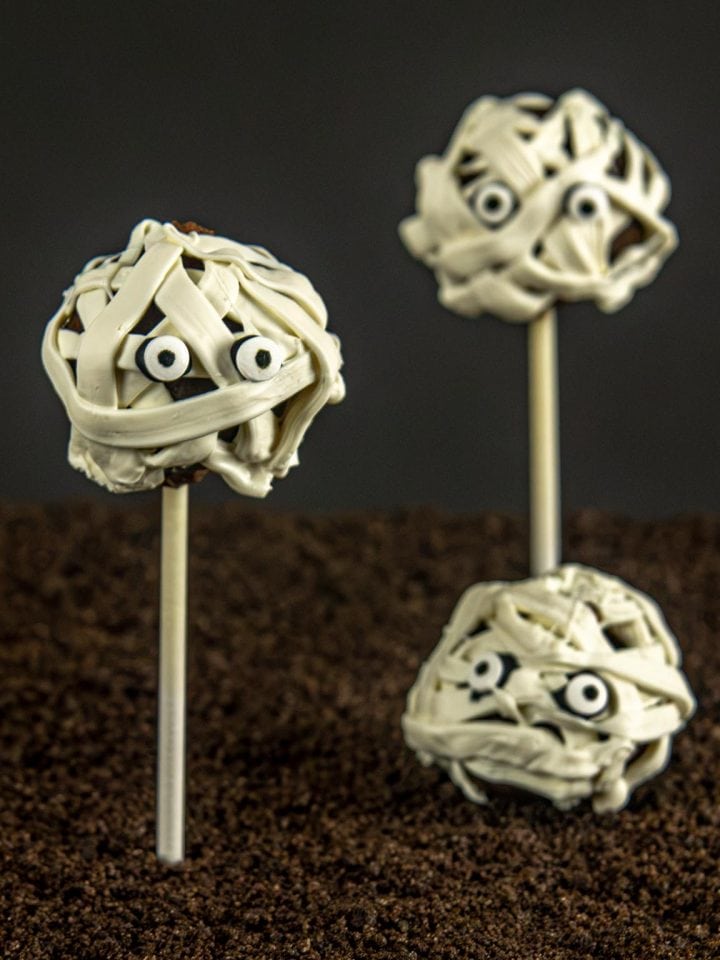
Photo by Drew Maresco
Using your favorite chocolate cake recipe, bake according to instructions and let cool completely.
In a large bowl, crumble the cake and add the frosting, stir until the mixture can be formed. Using a small ice cream scoop, scoop out even balls; using your hands, roll them to be equally round balls. Chill for 10 minutes before decorating.
Melt the chocolate. Dip the stick tip into the chocolate and skewer the cake pops allowing the stick the stay in the pop. Once all the sticks are in the pops, pour the chocolate into a frosting bag or baggie, cut off the tip, and zig-zag the white around the balls, making a mummy wrapping. Add the eyes before the chocolate hardens. Let harden completely before serving.
These Chocolate Cake Mummy Pops are a fun, low-fuss dessert when you want something festive without baking a fancy cake from scratch. They use a classic cake-pop method: crumbled chocolate cake gets mixed with frosting, shaped into balls, then coated and decorated so they look like little mummies. The result is rich, soft in the center, and sweet all the way through, with a crackly white chocolate shell.
The frosting is doing the heavy lifting here. It binds the cake crumbs just enough to let you roll firm balls that stay together on a stick. If the mixture feels too loose, it usually needs a little more cake. If it feels dry and won’t pack cleanly, add a small spoonful more frosting. You want a texture that clumps when pressed, not one that feels greasy or sticky.
Chilling the shaped balls before decorating is worth the extra few minutes. Cold cake pops are easier to skewer, and they’re less likely to slide off the stick when you add the coating.
The zig-zag white chocolate drizzle is what gives these pops their wrapped-up look, so it does not need to be perfect. In fact, a slightly messy finish works best. Thin, uneven lines look more like bandages than a smooth coating would. Let the drizzle cross over itself in a few places, and leave small gaps so the candy eyes still stand out.
For the eyes, add them while the chocolate is still soft enough to grip. If you wait too long, they can slide off instead of staying put. A little pressure is enough to set them in place.
The recipe starts with your favorite chocolate cake recipe, but you can make this as simple or as from-scratch as you want. A homemade cake gives you full control over the flavor, but a boxed cake mix also works well if you want a more beginner-friendly, weeknight-doable dessert project. What matters most is that the cake cools completely before you crumble it.
If the cake is even slightly warm, the mixture can turn soft and hard to shape. Cool cake gives you cleaner balls and a better final texture.
If you want the mummy wrapping to look more defined, pipe a few lines, pause for a moment, then add more. That layering gives the drizzle a little dimension without requiring any special decorating skills.
Chocolate cake and white chocolate already give these pops a nice contrast, but you can make small changes without changing the structure of the recipe.
Keep the outside and inside balanced. If you choose a very rich cake and a very sweet coating, the pops can taste a little heavy. A simple cake base helps the mummy design stay fun instead of overwhelming.
These are the kinds of details that make cake pops feel easy instead of frustrating. A little patience at the shaping and decorating stages goes a long way.
Once the chocolate is fully set, these pops are ready to serve right away. They’re a great make-ahead dessert for parties because they travel well and don’t need plating or slicing. If you’re making them in advance, keep them in a cool place so the coating stays firm and the decorations look neat.
For serving, arrange them upright in a sturdy base or lay them on a tray lined with parchment. That keeps the mummy wrap intact and makes them easy to grab.
Chocolate Cake Mummy Pops are the kind of dessert that looks playful without asking for a lot of extra work. They’re a good fit for Halloween parties, bake sales, or any dessert table that needs something eye-catching and easy to hold. If you’re looking for a beginner-friendly treat that feels special, this is one worth saving.
Make a batch when you want something shareable, small, and fun to decorate. Once you’ve done one round, the process gets easier fast, and you can use the same cake-pop method for other themed treats later on.
For another Halloween treat that uses a similarly spooky decorating idea, try Cheeseball Brain.

Free Gift
Grab our free ebook, Dinner Made Simple, with 32 quick recipes to help you get dinner on the table without the stress.
Sign up and we will send your free kitchen download straight to your inbox.
Recipe Feedback
Notice a typo or something unclear? Send us a quick note and we will review it.

